
Level 4: The final stretch
Preparing for the major league
Once our charcuterie module was complete, it was time to embrace the end of an era: Level 4. Our last level of culinary school had arrived. I was already sad that school was almost over, and we hadn’t even begun the level!
My feelings were complicated going into Level 4. Not only was I already in pre-mourning over the end of school, I was also apprehensive — and for good reason. Over my three months progressing through the prior levels, I had heard whispers…ok, sometimes loud complaints…about the intensity of the final level of school. Every day in the locker room at 3pm, when we'd change out of our whites, a group of women currently in Level 4 would be tearfully or frustratedly commiserating about their day. In fact, when I was in Level 3, the group ahead of me had FOUR people drop out in their first week. Apparently, it was that tough. I wasn’t going to let myself drop out, that was for sure. But I had to steel myself for what was about to come.
Luckily, I had a few things working in my favor. First, we were back in a kitchen with an almost identical physical setup to Levels 1 and 2, where I had initially built up my confidence. The oversized and overwhelming locale of family meal and charcuterie was history. Second, we found out that we had the same instructor as we had for Level 2, who is one of my favorite people I met during school of students and teachers alike. I knew we would thrive with his calming and patient energy, great sense of humor, and clear instruction, even if the curriculum itself got tough. Third, whatever was about to come at me, it was only for 20 days — so all I had to do was understand exactly what I was about to get myself into and prepare myself, and I knew I would make it through.

I was happy to be back in a smaller scale kitchen for Level 4
So, I tried to go into Level 4 with an open mind, gathering my facts so that I could do the best job possible and learn as much as I could. Here’s what I uncovered:
The nature of the beast
In a nutshell, Level 4 is designed to bring all of your newly acquired culinary skills together. The goal is to help you consolidate everything you’ve learned and prepare you to take on a real job in a restaurant kitchen. Specifically, you put to work:
All the fundamental cooking techniques you learned in Levels 1 and 2 (both savory and pastry)
The preparation and time management essential to family meal
The solo ownership of your dishes from charcuterie
If culinary school were a beautiful roasty veal stock, Level 4 would be its highly boiled down, intensely flavored and syrupy offspring: a glace. A distillation and concentration of everything to date. Bit of a niche metaphor, but I’m going with it! At the end, you are theoretically prepared to dive headfirst into your restaurant externship, the final requirement to graduate from culinary school.
So that’s the theory and purpose behind Level 4, which is helpful, but it doesn’t really give you many clues as to what each day looks like. Here’s a clue: it’s a marathon run at a HIGHLY aggressive pace. You're prepping and cooking nonstop from the moment class begins (9:30am) until about 1:30 or 2pm, with no breaks. Not even for lunch. If you’re running ahead of schedule and can find a few moments to shovel something in your mouth, good for you. And good luck trying to pee. This is a large part of why the level is so intense.
As far as what you’re cooking, it depends. Every day, you show up ready to execute two dishes that you’ve been assigned in advance. The dishes are selected from a pre-set four course menu consisting of an appetizer (first course), fish (second course), entrée (third course), and dessert (fourth course). Half of the class is assigned the same two courses as you, and the other half of the class is on the other two courses from the menu. So all together, you’re making this full four course menu every day. But, like charcuterie, everyone is working on his or her own. No working together.
After three days, the halves of the class switch. So, if for the first three days you were working on courses 1 and 3 — appetizers and mains — the second three days you shift gears to courses 2 and 4, fish and dessert...and vice versa. In total, there are three menus, so this means you cook twelve dishes altogether over the course of the level. To make it more concrete, here are the actual four course menus that you cook your way through during Level 4. As you might guess, they get progressively more difficult as you move through the level.


Here’s the catch. It’s not simply cooking all day. For each dish, you are consistently evaluated on three key dimensions: execution, timing, and presentation:
Execution: if you’re making the steak entrée from Menu 1 above, your steak is cooked to a perfect medium rare, it’s properly seasoned, your spinach is perfectly sautéed – not overly wilted — and everything is served hot.
Timing: you’re delivering complete dishes to your instructors at the exact time you’ve been assigned, not a minute too early or too late. You’re given a little latitude in the first day or two if you don’t get everything right, but by day 3 of your dish pairing, you’re expected to deliver on all counts, and with “finesse”, as Chef put it.
Presentation: the dish needs to adhere to the plating design set out by the instructor, and if the dish is hot, it needs to be served on a hot plate. This means heating the plates in the oven or on the flat top for about 5 minutes before you need to begin plating your dish, which needs to occur about 10 minutes before service, on average. It’s a lot of timing to manage
In summary, it works like this: Day 1: Learn it; Day 2: Refine it; Day 3: Nail it. Day 3 is meant to simulate your final exam, when you're assigned two dishes randomly out of all of the menus, and you need to hit it out of the park in both execution and timing.
It doesn’t seem too hard right? Just cook two dishes and you’re done! Ok fair, it’s not rocket science, but it’s also not as easy as it seems. The tough part is creating and then sticking to a game plan that sets you up for success. The core principle is that just because your appetizer is served first, it doesn’t mean that you wait until after you’ve served it to start on your entree. Quite the opposite, actually. You need to work backwards, assessing how much time every component of each dish will take and when it needs to be complete. So, like charcuterie, there’s a lot of switching back and forth to make sure everything gets done. For example, if your entrée is a stew that needs to braise for 2 hours and you only have an hour after your appetizer is served before you need to serve the stew, you must get it going well before your appetizer is complete, perhaps even first thing in the morning.
You’re also responsible for pulling out all of your tools and gathering your ingredients to execute your plan efficiently, which means that’s the very first thing you do. In fact, if you don’t arrive in the classroom at least fifteen minutes in advance to lay out your tools and grab your bowls, pots and pans, you are essentially screwed. As soon as the clock hits 9:30am, it's a collective mad dash to get all the ingredients so that you can get started.
Below, the calm before the storm of everyone descending upon these counters to grab their ingredients as quickly as possible.


We needed a LOT of tools on any given day. You can see mine are marked with purple galaxy tape so that they wouldn’t get mixed up with others’.

On a day when we were making meat, I would need a boning knife (middle) in addition to my standard chef and paring knives. On fish days, a fillet knife was necessary, and when we were making tarts, we’d need a slicing knife. Lots of potential hazards!
With me so far? If not, I think you’ll start to understand the experience more as I take you through the dish pairings that I cooked every three days.
Behind the scenes
Quickly before we go into the food, I’ll talk about my own experience with the level. Contrary to what I had heard from previous students, I actually found it to be incredibly fun and exhilarating, even if it had stressful moments. The first day of each new menu was, as our instructor would say, an unequivocal “shitshow” as everyone attempted to pin down the timings and execution. As the days went on, however, I fell into a groove. The time flew by, and I was laser focused on doing my best; I was in a flow state, a.k.a. in the zone.
This is not to say that everything was puppies and rainbows. There were moments of extreme frustration. For example, I quickly realized that that some of my classmates were much naturally faster at food prep than I was, which is a key element of success in a restaurant kitchen. I was never late, but I was probably in the 60th percentile as far as speed. Since I am type A and push myself to be the best I can be, it didn’t feel great to lag behind some of my classmates and know I could do better. There were also a couple days when my dishes did not turn out as well as I would have liked, which was disappointing when I was putting in my all. In fact, the only time I cried in culinary school (other than after having a fight with my friend during charcuterie) was the last day of our final menu, when I just couldn’t get a pasta dish right — more on that later.
Now for the headline act: the food!
Pairing 1 — Appetizer and Entrée
Salade de crudités // Grilled hangar steak with pommes darphin and sautéed spinach
The salad of my nightmares

The steak of my dreams
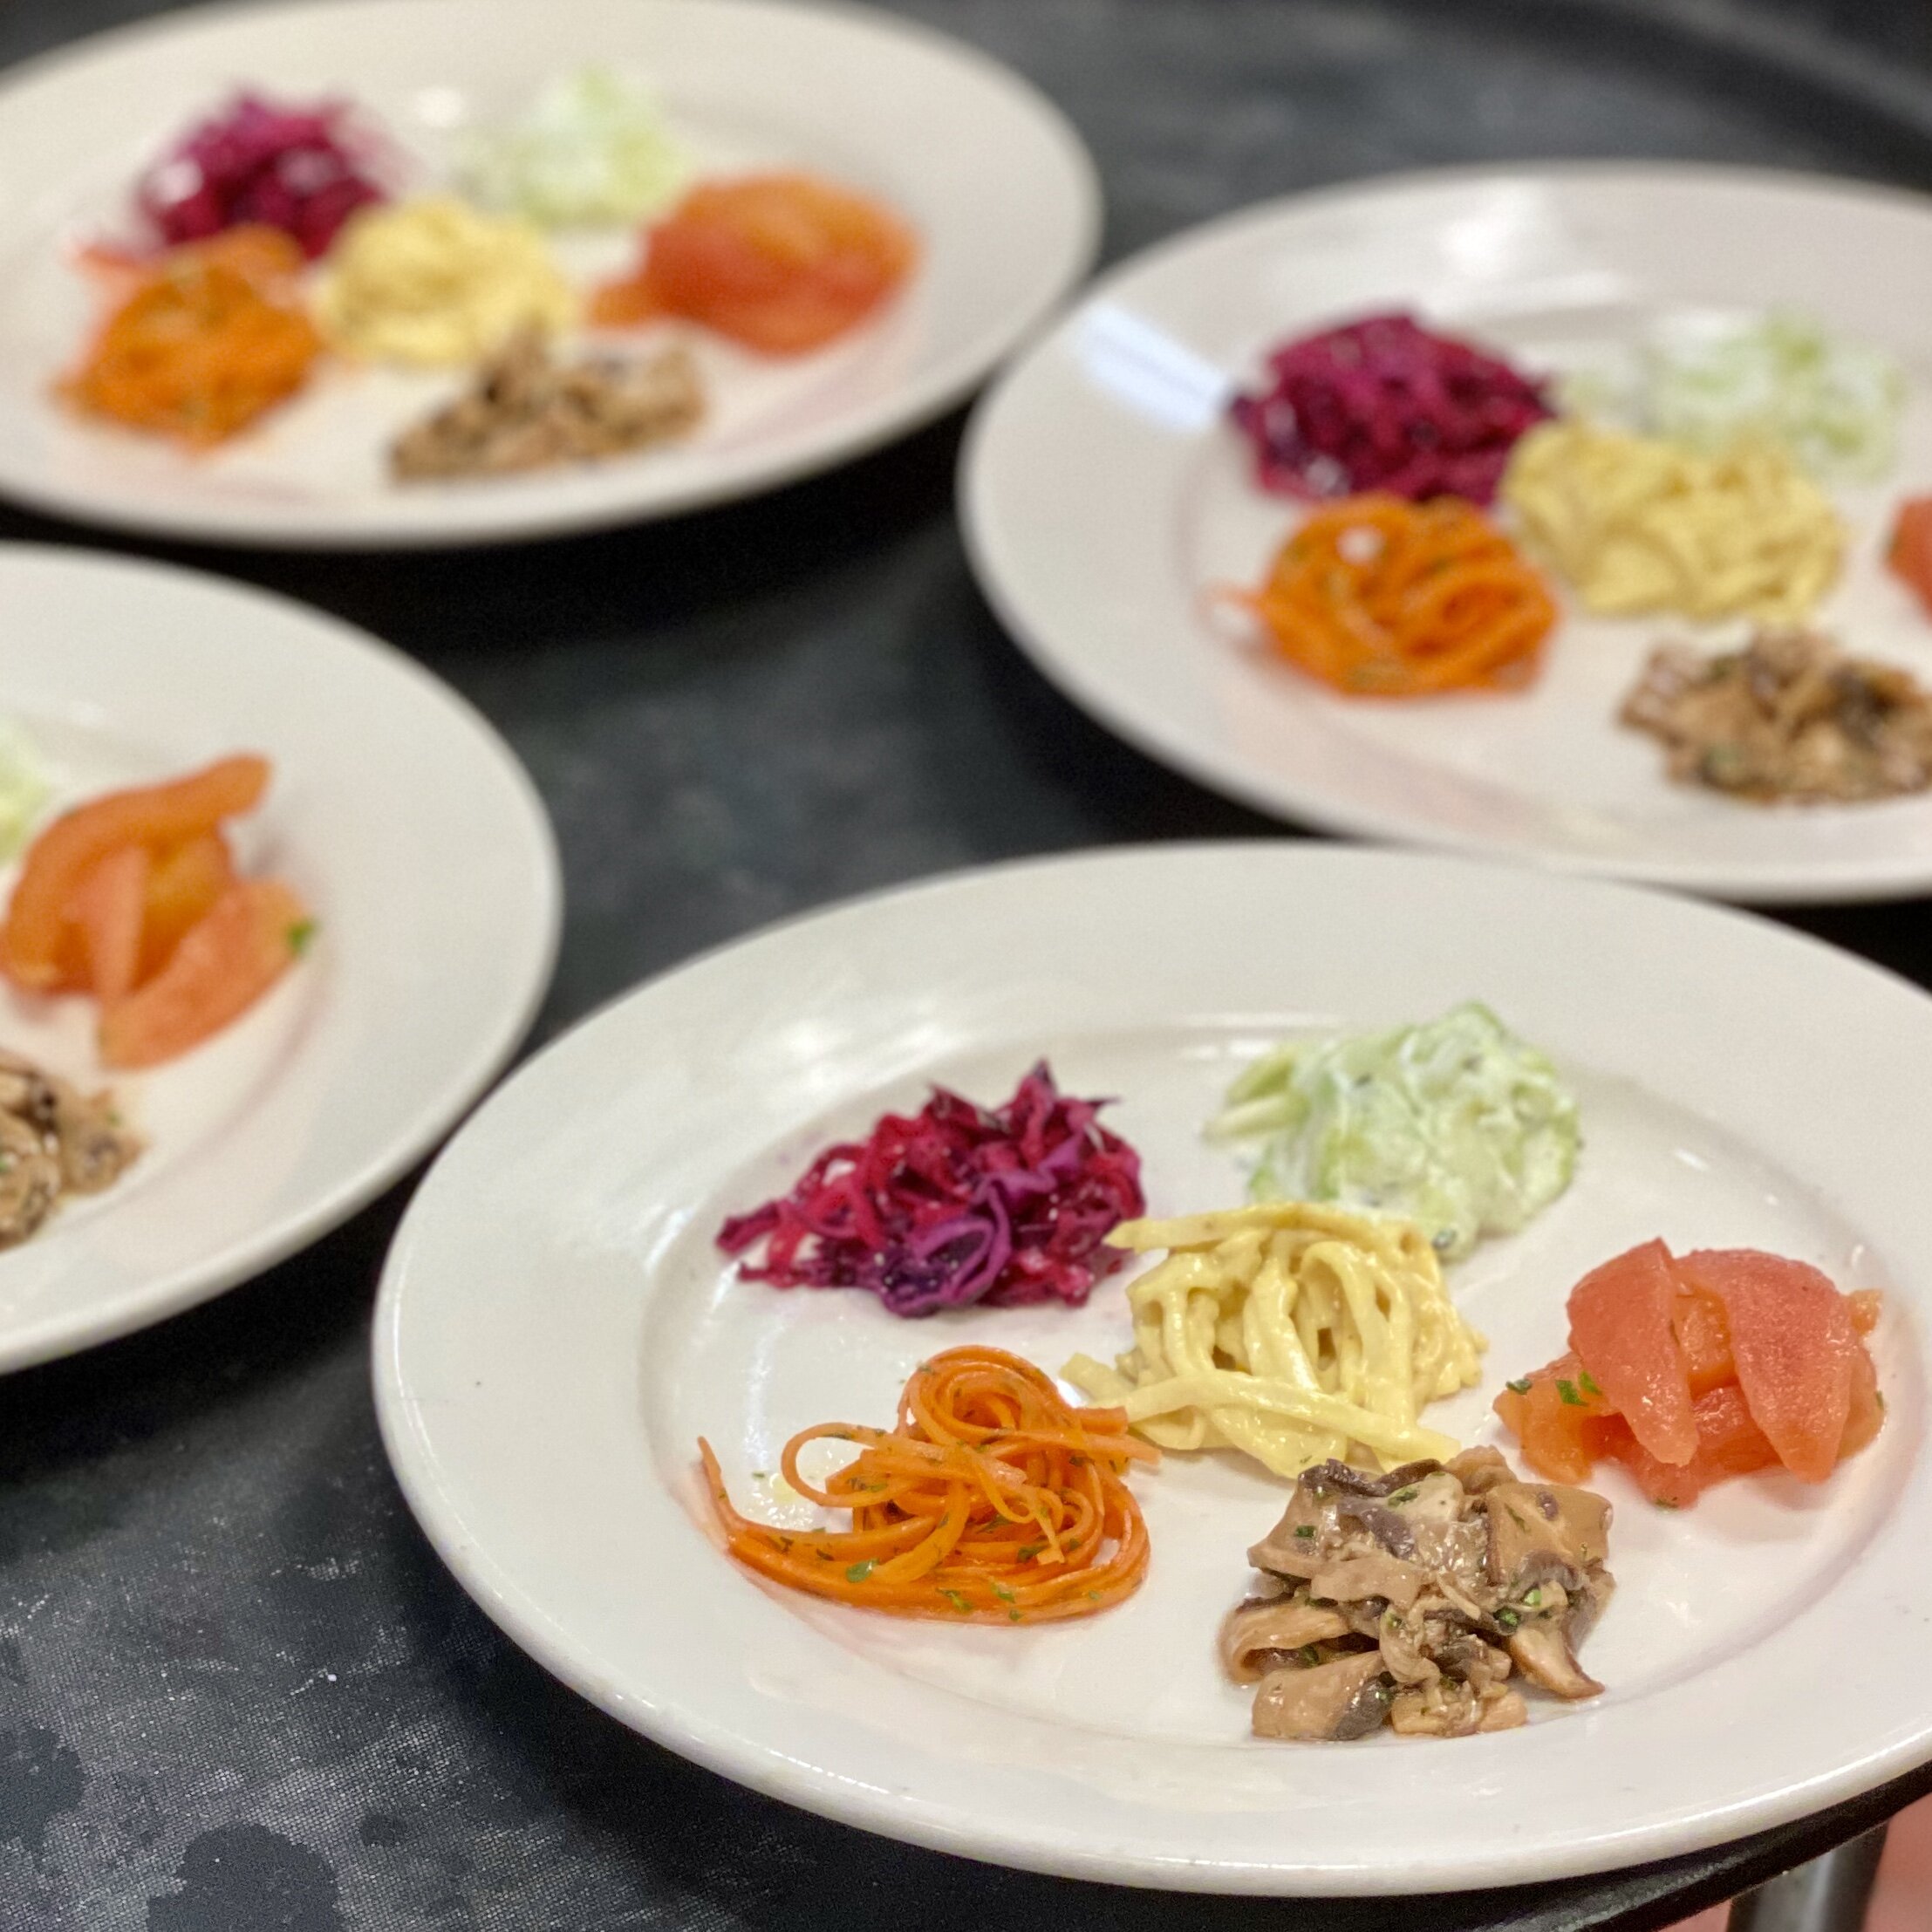
Prior to Level 4, whenever I thought of crudité, I thought of a platter consisting of a simple pile of peeled and trimmed carrots, celery, and maybe some raw broccoli or radishes served with a side of hummus, guac, and/or ranch dressing. Not so here. This dish was INVOLVED. To be specific, it required slicing six different vegetables to half the width of a matchstick, making a unique dressing for each of them, and mincing a different herb for each of them before assembling the salads separately and painstakingly on a plate. It took over an hour to make, and 20 minutes to plate.
The specific salads were: carrots with a lemon parsley citronette; celery root with remoulade; cucumbers with lime, mint and whipped cream (particularly weird); mushrooms with sherry tarragon vinaigrette, red cabbage with red wine vinaigrette; tomatoes with a white wine chive vinaigrette.
Fortunately, my displeasure with the salad dish was balanced by the steak and béarnaise dish, which was a huge winner in my book. The rich and tangy béarnaise was the perfect dipping sauce for the charred steak and crunchy pommes darphin, and the sautéed spinach made the dish feel slightly healthy. You really can’t go wrong with steak and potatoes. And after three days in a row of this dish, I now know how to make a béarnaise basically with my eyes closed — a skill I’m thrilled to have in my back pocket!
The keys to nailing this pairing were getting your potato pancake and the wine-y, vinegar-y béarnaise sauce base done before serving the salad, otherwise you wouldn’t have time to complete everything after lunch. As long as you could get that done, you were golden. But you couldn’t get the full sauce done before the first course was served because of food safety: no one wants to eat an eggy sauce that’s been sitting on a counter for multiple hours. Now you start to understand the pacing needed to pull these combinations off.

The early makings of béarnaise, which used almost half a pound of butter each day. We couldn’t get started on this step until after serving the salads because it would be unsafe to let an egg yolk based mixture sit out for multiple hours.
In case you’re curious about my step-by-step plan to get everything done, here’s my plan of attack that I followed. It may not be the most interesting thing to read, but even a quick glance will give you a sense of the intricacy and detail required to get this pairing done. I created prep sheets for each pairing in this level, which I’ll share with you as we go.


Pairing 2 — Fish and Dessert
Crispy branzino with tomato vinaigrette and sautéed spinach and mushrooms // Chocolate and raspberry roulade

This one was a keeper
Hall of mirrors
This pairing was wonderful, and it actually felt pretty healthy after eating steak with potatoes and butter sauce for three days straight…well, at least the fish did. The branzino required us to practice our searing skills — searing fish is tricky in a stainless steel pan that is NOT nonstick and relies on having an incredibly hot pan with hot oil. This means that you need to be careful when putting your fish in the pan, lest you splatter yourself or your partner across the island with 300+ degree oil. Ouch.
The smoky tomato vinaigrette was a delightfully hearty complement to the clean and crisp flavor of the branzino. We used a Vitamix to achieve a silky smooth texture, first blending the slow-roasted, spiced tomatoes until there were absolutely no clumps, and then adding a combination of olive and vegetable oil in a steady stream while blending to create a smooth emulsion.
Overall, the components of the fish dish were not especially complex, but the plating needed to happen extremely quickly to make sure that the dish would still be hot when served. Both the sauce and the fish were thin enough that they wouldn’t retain heat for very long on their own, so the plate itself needed to be almost too hot to touch and the components plated JUST before serving to get it right. To summarize, plating this dish was a rush — both mentally and temporally.

Plating my branzino as quickly as possible so that it wouldn’t get cold.

Throughout the level, we had to make four portions of each dish.
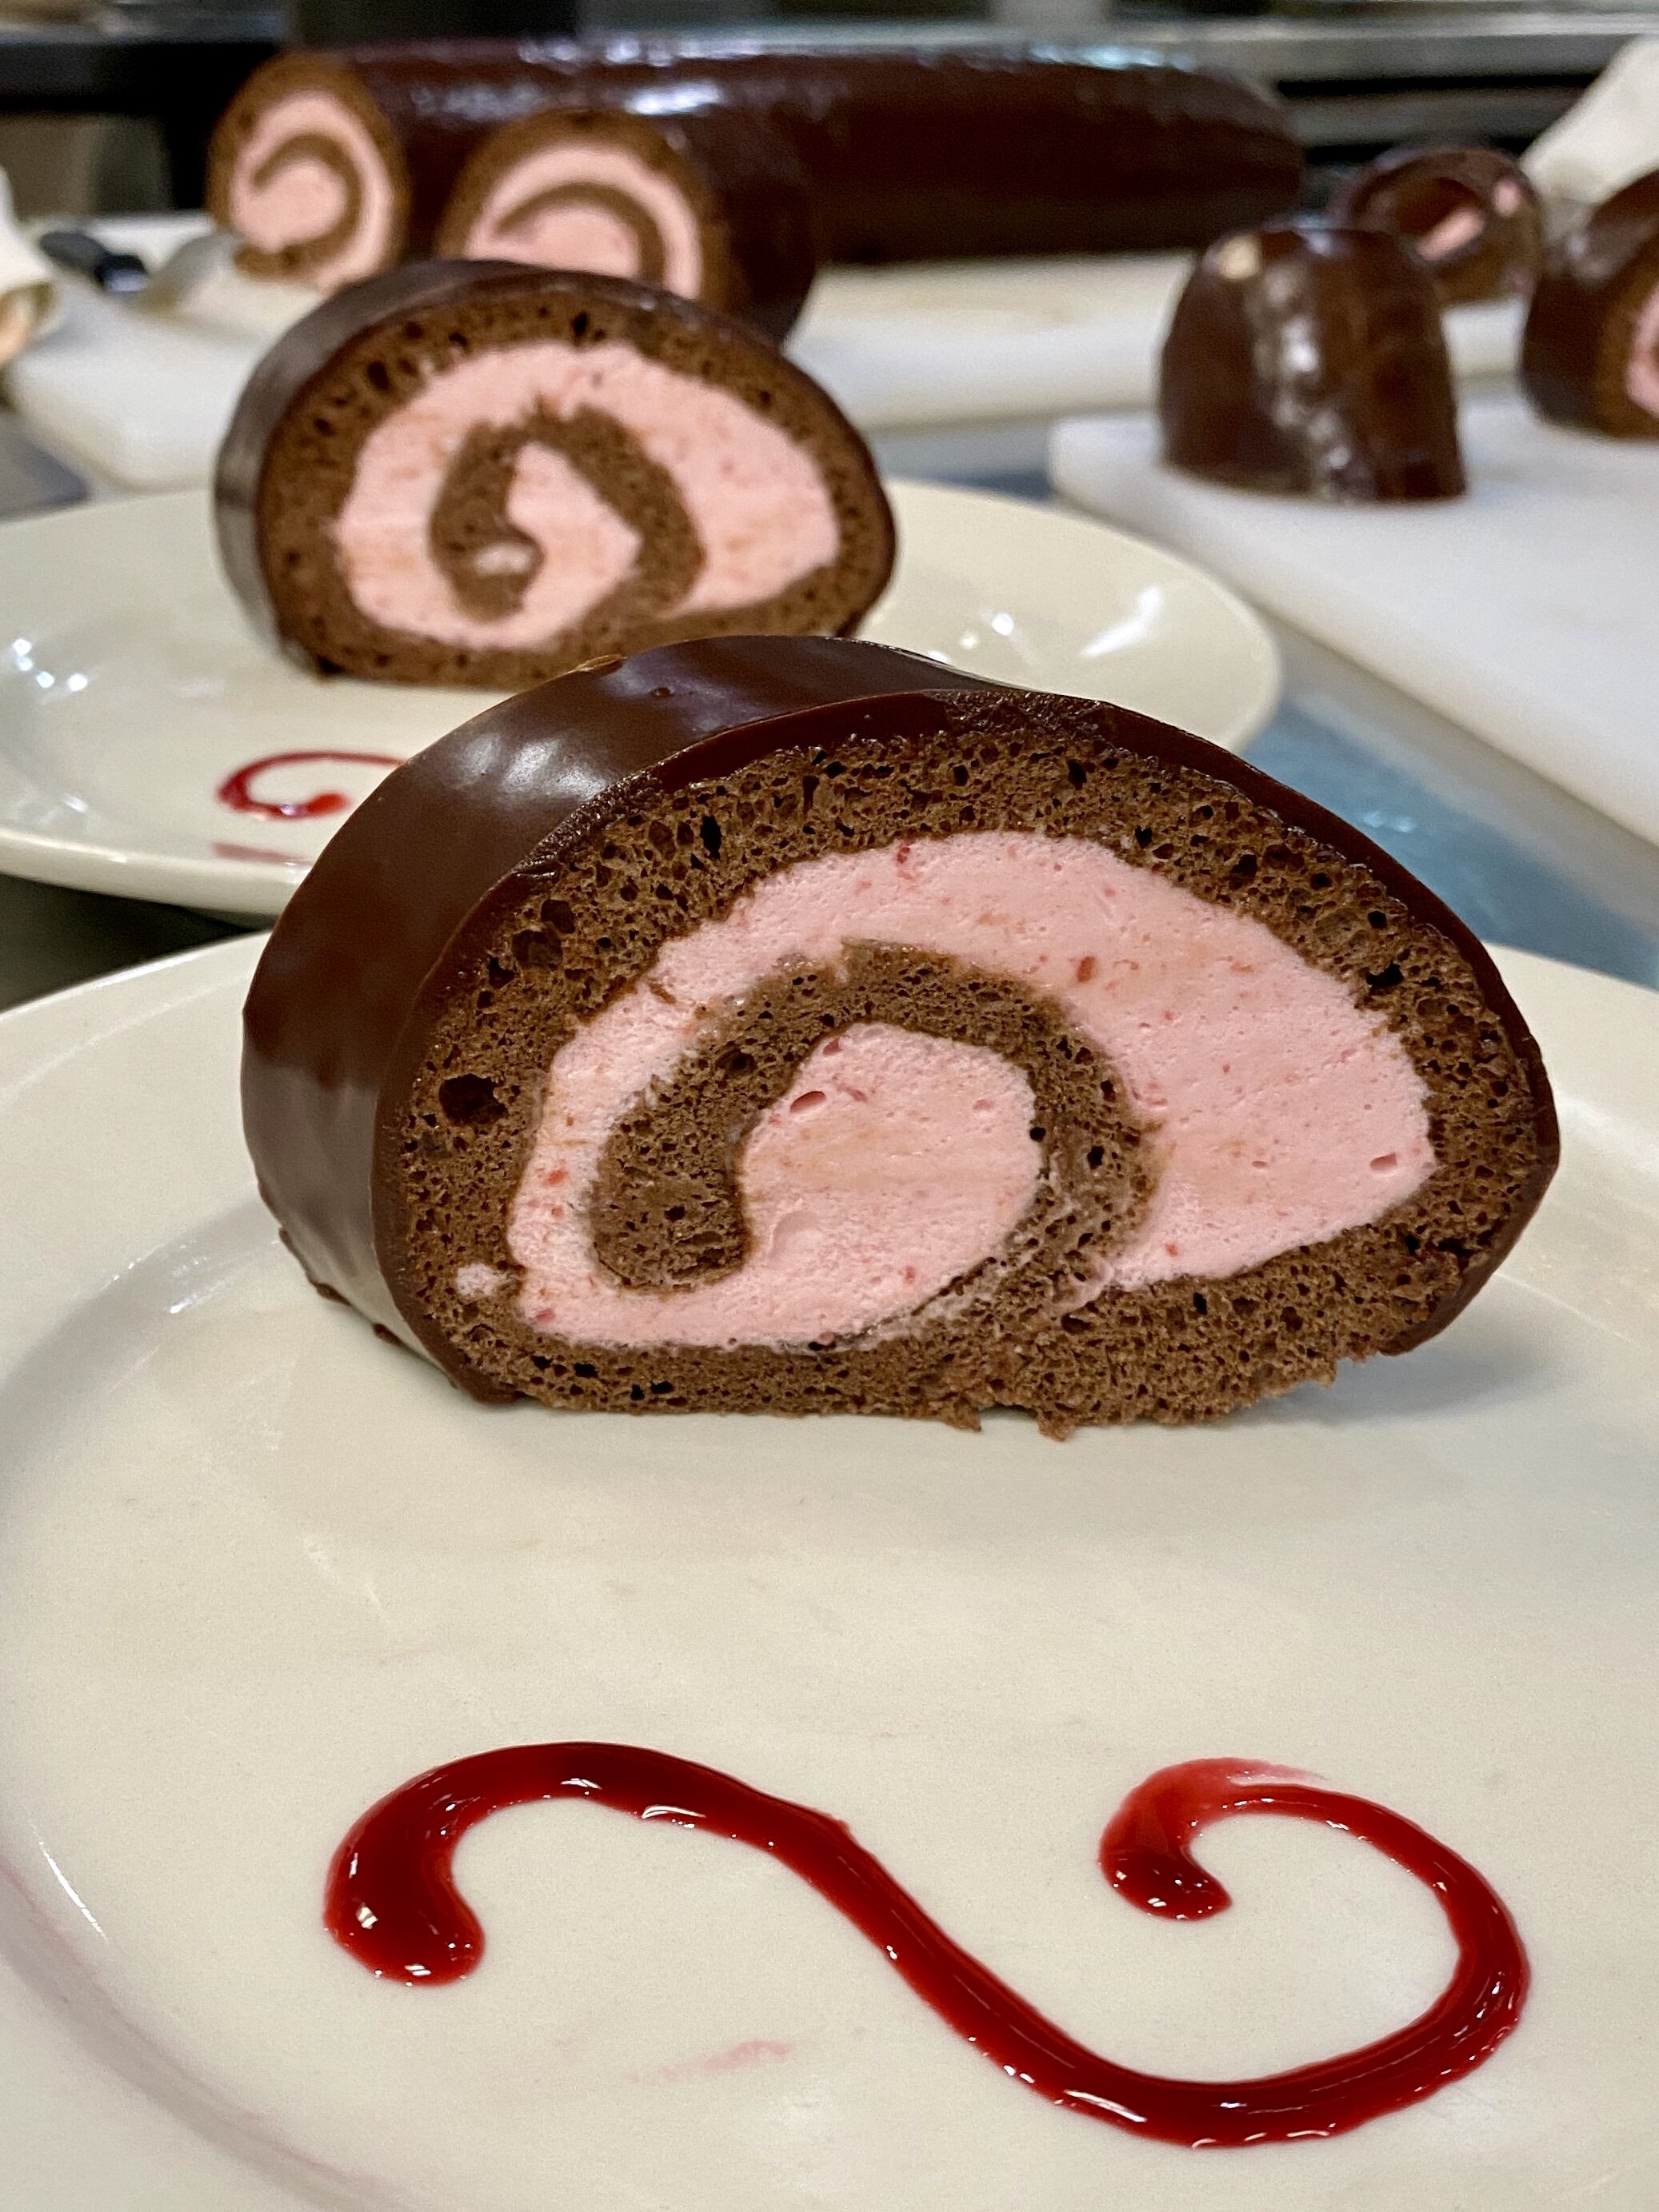
Moving on, I wasn’t initially in love with the idea of the chocolate raspberry roulade (also known as a jelly roll cake) as I’m normally not big on chocolate and fruit combinations. This one grew on me, though, especially because of the beautiful velvety ganache coating that brought it all together. While the fluffy cake and luscious whipped cream filling were nice, my favorite part was the chocolate glaze. THIS GLAZE. It’s hard to describe how incredible it was. My whole class marveled at the miracle of mixing warm cream, melted butter, a touch of sugar, and chocolate into a shiny and pourable sauce. I was licking the bowl, and my classmates were too. See my smile in picture two below for evidence.

Before the glaze

Mid-glaze. Pure joy!

After. So satisfying

What a difference a little makeup makes!
And, like before, here is the plan I put together to get these two dishes done well and on time. This round, I learned it helps to be a more concise — that way it was easy for me to scan my sheet quickly when I needed a reminder of what to do next.

Pairing 3 — Appetizer and Entrée
Gnocchi Parisienne with peas, tomatoes and sage // Lamb, fennel, and prune stew

This gnocchi is not what you think it is

Only this stew could make me like prunes and fennel
I had completed the first four course menu, and now it was back to the appetizer and entrée combination, this time from Menu 2. These dishes were a heavy pairing, starting with a buttery pasta dish and then moving on to a rich, sweet and savory lamb stew. While the stew was the second course we would serve, we needed to prepare almost all of it first because of its lengthy cook time. Tough cuts of meat like lamb shoulder (what we used) need to cook low and slow in the oven — this lamb needed two hours of stewing for optimal tenderness. So this baby needed to get in the oven immediately, and there were a few key steps to execute before that to guarantee stew success.
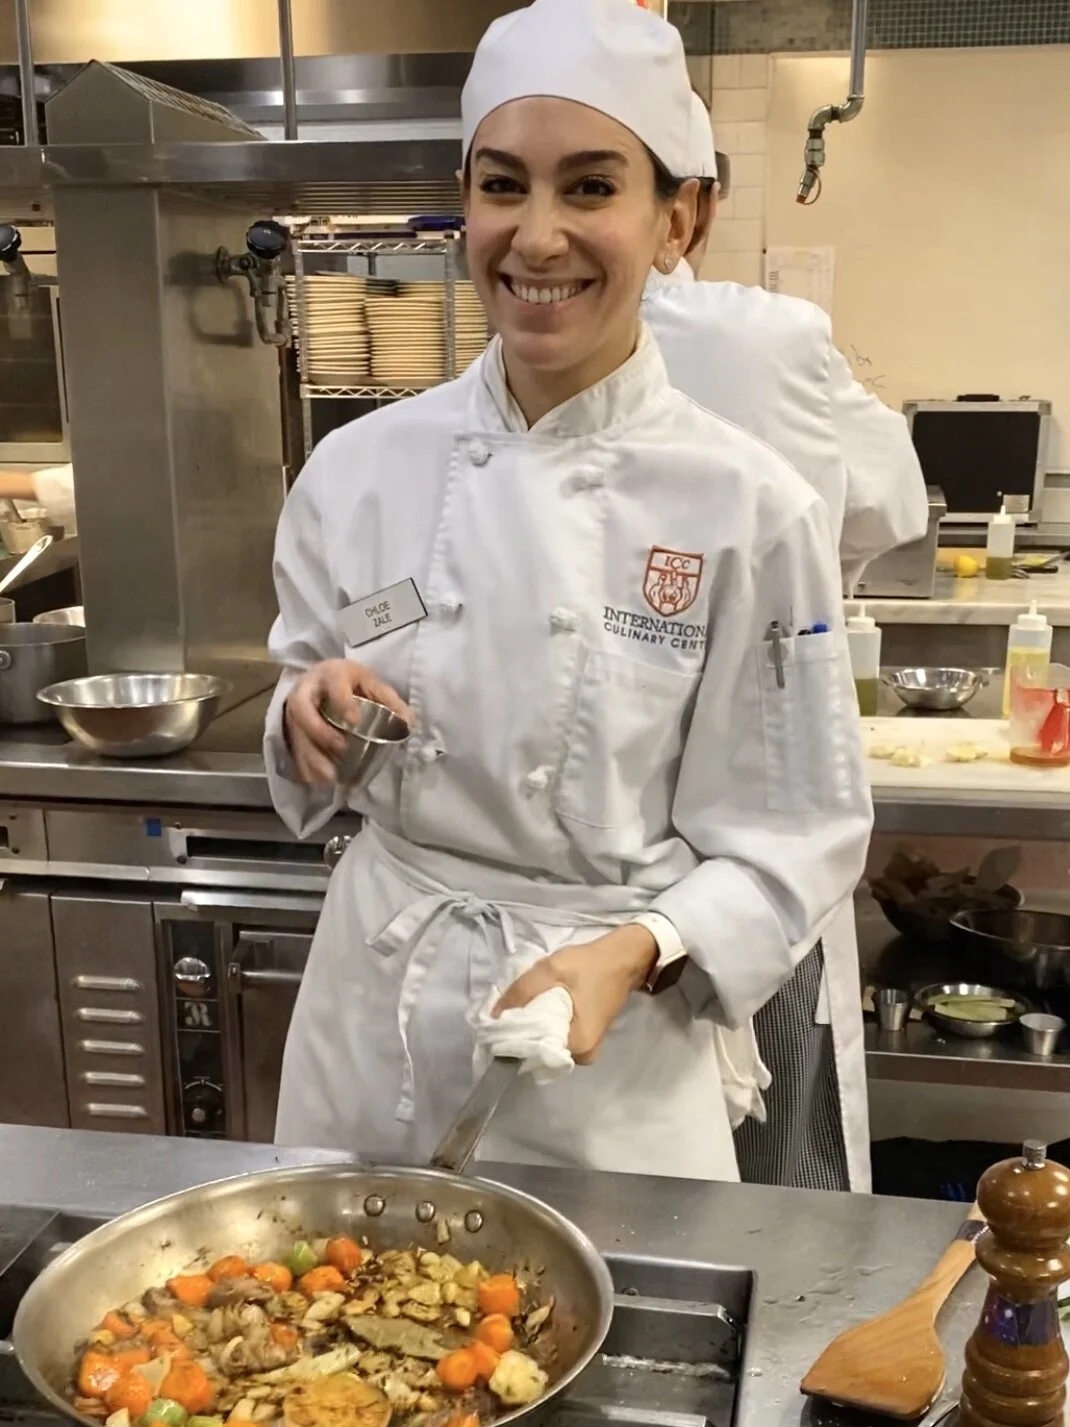
An important reminder: over the course of culinary school, we learned the importance of building flavor at every step of the cooking process, especially when making sauces, stocks, braises and stews with rich tones. This lamb stew was the perfect example. To start off on the right foot, after breaking down the shoulder into 1 inch cubes, we needed to brown the lamb on all sides, developing as much roasty caramelization as possible to create depth and deliciousness in the sauce. This process was not to be rushed. The rest of the ingredients also required various levels of browning and toasting to continue to build that deep flavor. And no French meat stew is complete without a little brandy flambé for subtle sweetness and really just some entertainment during the cooking process. I became significantly more comfortable with my flambé technique over the course of my three days cooking this stew. Maybe a little bit too comfortable…one day, I almost burned my face when I accidentally tilted the pan towards me rather than away when lighting the brandy on fire. It was a close call.
Finally, while I am not big on anise-y fennel or cloying prunes, these key ingredients worked really well in the completed dish. The sweetness of the prunes mellowed with time, and I couldn’t taste any notes of licorice from the fennel, only an earthy complexity that added something special to the stew. It just goes to show the power of low and slow cooking with thoughtful ingredients. Once all this was done, there wasn’t much left to do other than cook a few vegetables that we’d serve with the final plate.
The four stages of flambé

Pour brandy in pan

Pray that you don’t burn off your face

Shake pan to prevent said burning of face
Live to see another day
Phew! That’s quite a to-do list even before getting started on the first course! On that front, gnocchi Parisienne is different from the gnocchi that most of us are used to, and it’s arguably easier as long as you have the right tools. It has neither potatoes nor ricotta in it. Instead, it’s made from the same dough as profiteroles and éclairs: pâte à choux (flashback to our pastry module), which is known for being cooked twice, once on the stove and then either baked in the oven, fried in hot oil, or poached in water. Here we used the poaching method, piping the cooked dough from a pastry bag straight into simmering water. This required some coordination, cutting the extruding dough with a paring knife into equal segments, all while being careful not to let the hot water splash you in the face. After a few minutes of simmering, the little pillows were done.

Plop!

Poached and ready for the frying pan
As the gnocchi dough was getting sectioned into adorable little plumps, we were slow-roasting sweet cherry tomatoes in the background to play an integral role in the final dish. Close to service, we took our tomatoes out of the oven, parcooked a handful sweet peas, thinly sliced a bunch of sage and tossed it all in brown butter shallot sauce with the gnocchi for the finish. I found the flavors of the dish to be a little incongruous: gnocchi with brown butter and sage feels autumnal to me, but peas are springy and tomatoes are summery. It was a little all over the place, but the gnocchi technique was fun, useful, and easy — a great staple to add to the home rotation.
Below, you’ll see that I started to reinforce the value of a one-page prep sheet for easy reference. Here’s the plan that worked for me:

Pairing 4 — Fish and Dessert
Sea bass en papillote // Lemon curd tart with crème chantilly

This fish was cuddled by a tomato fondue and mushroom duxelles on the bottom and julienned carrots, celery and leeks on top

I could eat this lemon tart every day. Oh wait, I did.
While the other pairing on Menu 2 was a lot to swallow, these dishes were light and refreshing, a welcome change. Remember, I had been eating the gnocchi and lamb for lunch for three days straight! I also liked this pairing because it felt like greeting an old friend; we had actually made this exact sea bass in parchment paper before, back in Level 2, on the first day that we learned how to clean and fillet fish. I was happy to see it return because a) it’s delicious and b) I realized how much my knife skills had improved with both fish and vegetables.
Process wise, this was another top-heavy pairing, in that the second dish had to be almost complete by the time the fish was due to be served. The lemon curd required about an hour of time to chill in the refrigerator to set in the baked crust, so if you didn’t want a runny lemon tart, you needed to move quickly. So, even though the fish dish had a ton of components, the tart shell came first, and the curd soon thereafter. Fun fact that I did not know before making this tart: a curd in a dessert context is just a stirred custard, made on the stove with egg yolks, sugar, butter, and whatever other flavors you’d like. The technique is not that different from making a béarnaise sauce — you just want to make sure that the eggs don’t scramble when you’re heating up the mixture to thicken it. We also had the benefit of adding a little gelatin to our curd so that it would set up quite firmly and be sliceable.
Once the tart was in good shape, we could move onto the fish. It was quite a technical process as well, involving delicate knife skills to finely dice the mushrooms and julienne the vegetables on top. But the real kicker was sealing the parchment paper packets (papillotes) properly so that they would inflate in the oven as the fish cooked. We did this using egg whites and tightly crimping the edges of the packet so that they wouldn’t come undone from the upward pressure of the steam in the oven. While the fish would cook just fine in a papillote that had partially deflated, the drama of the presentation was a big component of this dish’s success.

As long as you seal them properly, these parchment packets puff up naturally in the oven. It’s like magic!

The simplest presentation still packs a punch
Over the course of the three days cooking this dish, I’d estimate that about 70% of my papillotes inflated. The technique is not easy, and frankly I’m not sure how much I would use this at home or even if I opened up my own restaurant. My least favorite part occurred right before pulling the inflated packets out of the oven, when I had to reach into the 450° inferno with scissors to cut a little slit in the corner of each packet so that they wouldn’t deflate upon hitting the cold air outside of the oven (I still don’t understand the physics of this, so don’t ask). The first day I tried to do this, I made the mistake of standing directly in front of the oven when opening it, so that when I leaned down, I got a whoosh of scalding air in my face. I knew that I had made a mistake when I felt the unmistakable sensation of my eyelashes being singed off my face, but the show had to go on. I snipped the packets and brought them up to Chef for tasting. Right when that was finished, I ran to the bathroom to check on my eyelashes — luckily for me they were still there, but it turns out that my mascara had completely melted down my face with that fiery gust. I definitely had some Heath Ledger Joker vibes going on.

Me taking my papillotes out of the 450° oven.
Once the fish was done, it was time to transition back to the tart. There wasn’t much left to do other than make the whipped cream with powdered sugar, but one tricky element remained: slicing the tarts without breaking the crust or crinkling its lovely taut surface. What helps is to have a warm slicing knife and to gently draw it back and forth across the entire tart — no jerky downward chops to carve out little segments, or you’ll end up with a jagged end result. We also worked on our quenelle technique with the whipped cream, dragging a clean, slightly wet and warm spoon upward along the side of a bowl to create perfectly smooth and plump elliptical shapes to accompany our immaculate slices.

A classmate of mine practiced quenelles on every slice of her tart. The goal is to get them perfectly smooth and oblong, with a plump center and tapered edges. A clean, warm, and slightly wet spoon dragged across the inside of the bowl is the trick.
For my plan, I stuck with the one page format, though a bit wordier this time. In my original plan below, I had pushed off filling my tart until after the first course was served, but I learned pretty quickly that that was not the best way to set myself up for success. Still, this was the general order of things.

Pairing 5 — Appetizer and Entrée
Poached egg with tomato fondue and braised escarole // Truffle chicken with pommes mousseline and sautéed haricots verts

The lightest dish of the level, and a nice combination of bitter, sweet, creamy and fresh

Chicken bathed in truffle sauce with the creamiest mashed potatoes. What’s not to like?
Which came first, the chicken or the egg? Well, in this case, kind of both! The egg was served first, but the chicken was started first…so really, it’s all up to interpretation. Philosophical questions aside, I almost didn’t get sick of eating this pairing for three days straight. I also learned some cool tricks, like how to fully debone a chicken and how to poach multiple eggs in advance and gently hold them to serve later.
Like the other days, we got started on the main course first because a rich truffle sauce like that takes TIME! I bet you’re noticing a theme by now. To get the sauce going, we needed the bones from the chicken, so a full deboning session was the first step. Then, like the lamb stew, there was lots of browning of bones and vegetables, a flambé, and a long slow simmer. Once our sauce was simmering, we could get going on the egg dish, with its lengthiest component first: the tomato fondue. It takes a miracle ingredient to transform terrible pale winter tomatoes into a sweet, succulent tomato compote. What ingredient is that? Time! No, not thyme, though there was some in there too. Somehow with an hour and a half of slow cooking on the stove and nothing other than some olive oil, garlic, salt, pepper and thyme, these tomatoes went from anemic to astonishing.
The rest of the dish was pretty straightforward — sautéing bitter escarole with lots of garlic and red pepper flakes, and poaching eggs to go on top. I learned that you can poach an egg hours in advance and no one will be the wiser for it. As long as you cook it to just short of done, hold it in a bath of cold water with a little bit of ice, and then plop the egg back in simmering water for about a minute before serving, it tastes just like it’s been freshly poached. The only downside is that transferring the eggs back and forth from pot to bowl to pot to plate can create some unnecessary jostling with potentially poor consequences. I learned a tough lesson here: when I was pulling one of my eggs out of the pot right before service, I left too much distance between the pot and my plate, and in the transferring process I accidentally dropped it on the floor, where it promptly exploded. Face palm moment. My four portions of this dish were due in two minutes, so I just had to lay some paper towels down on the splatter and warn everyone around me about the egg massacre while I presented my plates. Even when the eggs didn’t go flying off their spoons, they would sometimes break in transit from pot to plate, so I learned to always make at least two more eggs than I intended to serve.
Once the eggs were served, it was time to make the chicken in earnest. After stuffing truffle slices under the skin of our deboned and split chickens, we spread them out and seared them skin-side down so that the skin would be ultra crisp and crackly. Then, we basted the flesh side with butter infused with rosemary and garlic (an aside: basting is an amazing technique!). A quick finish in the oven ensured they were perfectly cooked and safe to eat. Super buttery and creamy mashed potatoes were the ideal accompaniment to the rich, reduced truffle sauce, and some crisp-tender sautéed green beans rounded everything out. Fortunately this dish turned out pretty well for me all three days, and I have since used the deboning, searing and basting technique at home to great success.
Below, you’ll find the answer to the chicken and the egg question you’ve always been searching for: my prep sheet! You’re welcome.

Pairing 6 — Fish and Dessert
Seafood fettuccine with parsley and tarragon // Apple tart with bourbon crème anglaise

This was a tricky guy that I never got quite right

An old buddy, and one of my favorites
And we’ve made it to the last pairing! Unlike the other fish and dessert pairings, this one was not so light — that pasta required half a pound of butter for just four servings. This was also a tricky one, timing-wise, because it required us to make not one, but TWO doughs that both needed to rest in the refrigerator, the tart dough for 1 hour and the pasta dough for 30 minutes. So we needed to get cracking on the tart dough from the get-go. Fortunately, this pairing also featured another blast from the past, as we had made the apple tart in Level 2, so that made things a bit easier.
Once our doughs were in the fridge, we needed to get moving on the the apple tart’s filling and topping, stat. By the time those were done, the tart shell would need to go in the oven to bake, and then go back in the oven with the filling and topping for 60-90 minutes. Finally, it would take another 20-30 minutes to cool enough for slicing. So that definitely needed to be in the oven well before lunch. Only when that was done could we move on to the preparation of our first dish, the shrimp and mussel fettuccine. Now you can see how it was always borderline stressful, not knowing if we’d make it in time for course one. There were some interpersonal dynamics to navigate as well: we had to take turns with the person across the island to coordinate who was making the seafood sauce, and who was quickly rolling out and cutting their fettuccine, since we only had one pasta machine per couple. If one person was running behind, it would screw the other person up. Finally, on the pickup (the time right before the course was due), the pasta needed to be cooked as close as possible to serving, otherwise it would get cold and the sauce might deteriorate. So that timing was tight too.
I had a few snafus with both dishes in this pairing. First, with the tart, I managed to break our oven just by opening the door. I truly do not know how this happened! I just opened it to put the shell in to bake….and next thing I knew, there was a horrible thud, a scream from me, and all eyes in my direction to investigate the ruckus. The door had essentially fallen off its hinges, and then it wouldn’t stay closed. What’s worse, there was a delay in repairs, so it was broken for two days afterwards. The other tart debacle occurred once the oven got fixed, when I was making the apple compote filling. We needed to make a pot lid out of parchment paper, called a cartouche, which was something we had done many times since the beginning of school for various recipes. It requires cutting a large sheet of parchment in half and then folding it a few times in a specific pattern before trimming it into a circle shape and cutting a little hole in the middle. I am somewhat spatially challenged, and I always struggled with this task, but considering that I got it right on our Level 1 final exam, you’d think I would have gotten the hang of it by the end of Level 4. Not so. Rather than a normal lid, I somehow ended up with a set of parchment paper boobs, otherwise known as smaller twin lids attached in the middle. I still don’t know what went wrong. But it made for an excellent laugh to the point of tears.

Tart snafu 1: The great oven massacre of 2020, courtesy of me (or just an old crappy oven)

Tart snafu 2: this is what my cartouche was supposed to look like…

…and this was what I ended up with. My classmates and I debated calling it a bratouche or a carboob! Oops.
The snafu with the pasta was a culinary issue rather than a material-related one: I really struggled to nail the sauce technique. Specifically, it required finesse and attention to detail to get a perfect emulsion, which is the suspension of fat and water that gives good pasta its signature glossy sheen. As hard as I tried, I couldn’t get the hang of it — my emulsion kept breaking when I served it. As I mentioned before, the only time I cried in school, other than getting in a fight with my friend during charcuterie, was on Day 3 of this pairing when I still couldn’t get the emulsion right. Maybe it was an especially hard technique with fresh pasta, or maybe I was just exhausted leading up to the end of the level. All I could do was hope that it wouldn’t end up on our final exam, More about that in the next blog post!
The good news is that my pasta fail spurred a burning desire in me to conquer pasta during the current Covid quarantine, and I have now gotten the hang of the emulsion technique, which involves bringing the butter (or oil) and pasta water to a boil until you can hear it crackle and see the fat droplets disappearing into the water. I am proud to say that I regularly deliver an excellent, glossy pasta — the effects of perseverance and study!
Coming off that tangent and back to school, it was time for the crowning finish after the pasta was served: the crème anglaise for the apple tart. There’s really nothing out there that complements a buttery pasta like a starchy apple tart with vanilla bourbon cream sauce (kidding). Still, I wasn’t complaining. The vanilla sauce called on a similar skillset to the lemon curd and béarnaise, for which we whisked the boozy custard mixture over low heat to just under the brink of scrambling to achieve optimal smoothness and thick, velvety mouthfeel. This tart was a big winner: balanced in its zestiness and butteriness, with a soft filling and flaky crust. I will be making it again come fall — and maybe a peach version this summer. I can’t wait!

I did not excel at the pasta twirl, or the sauce method.
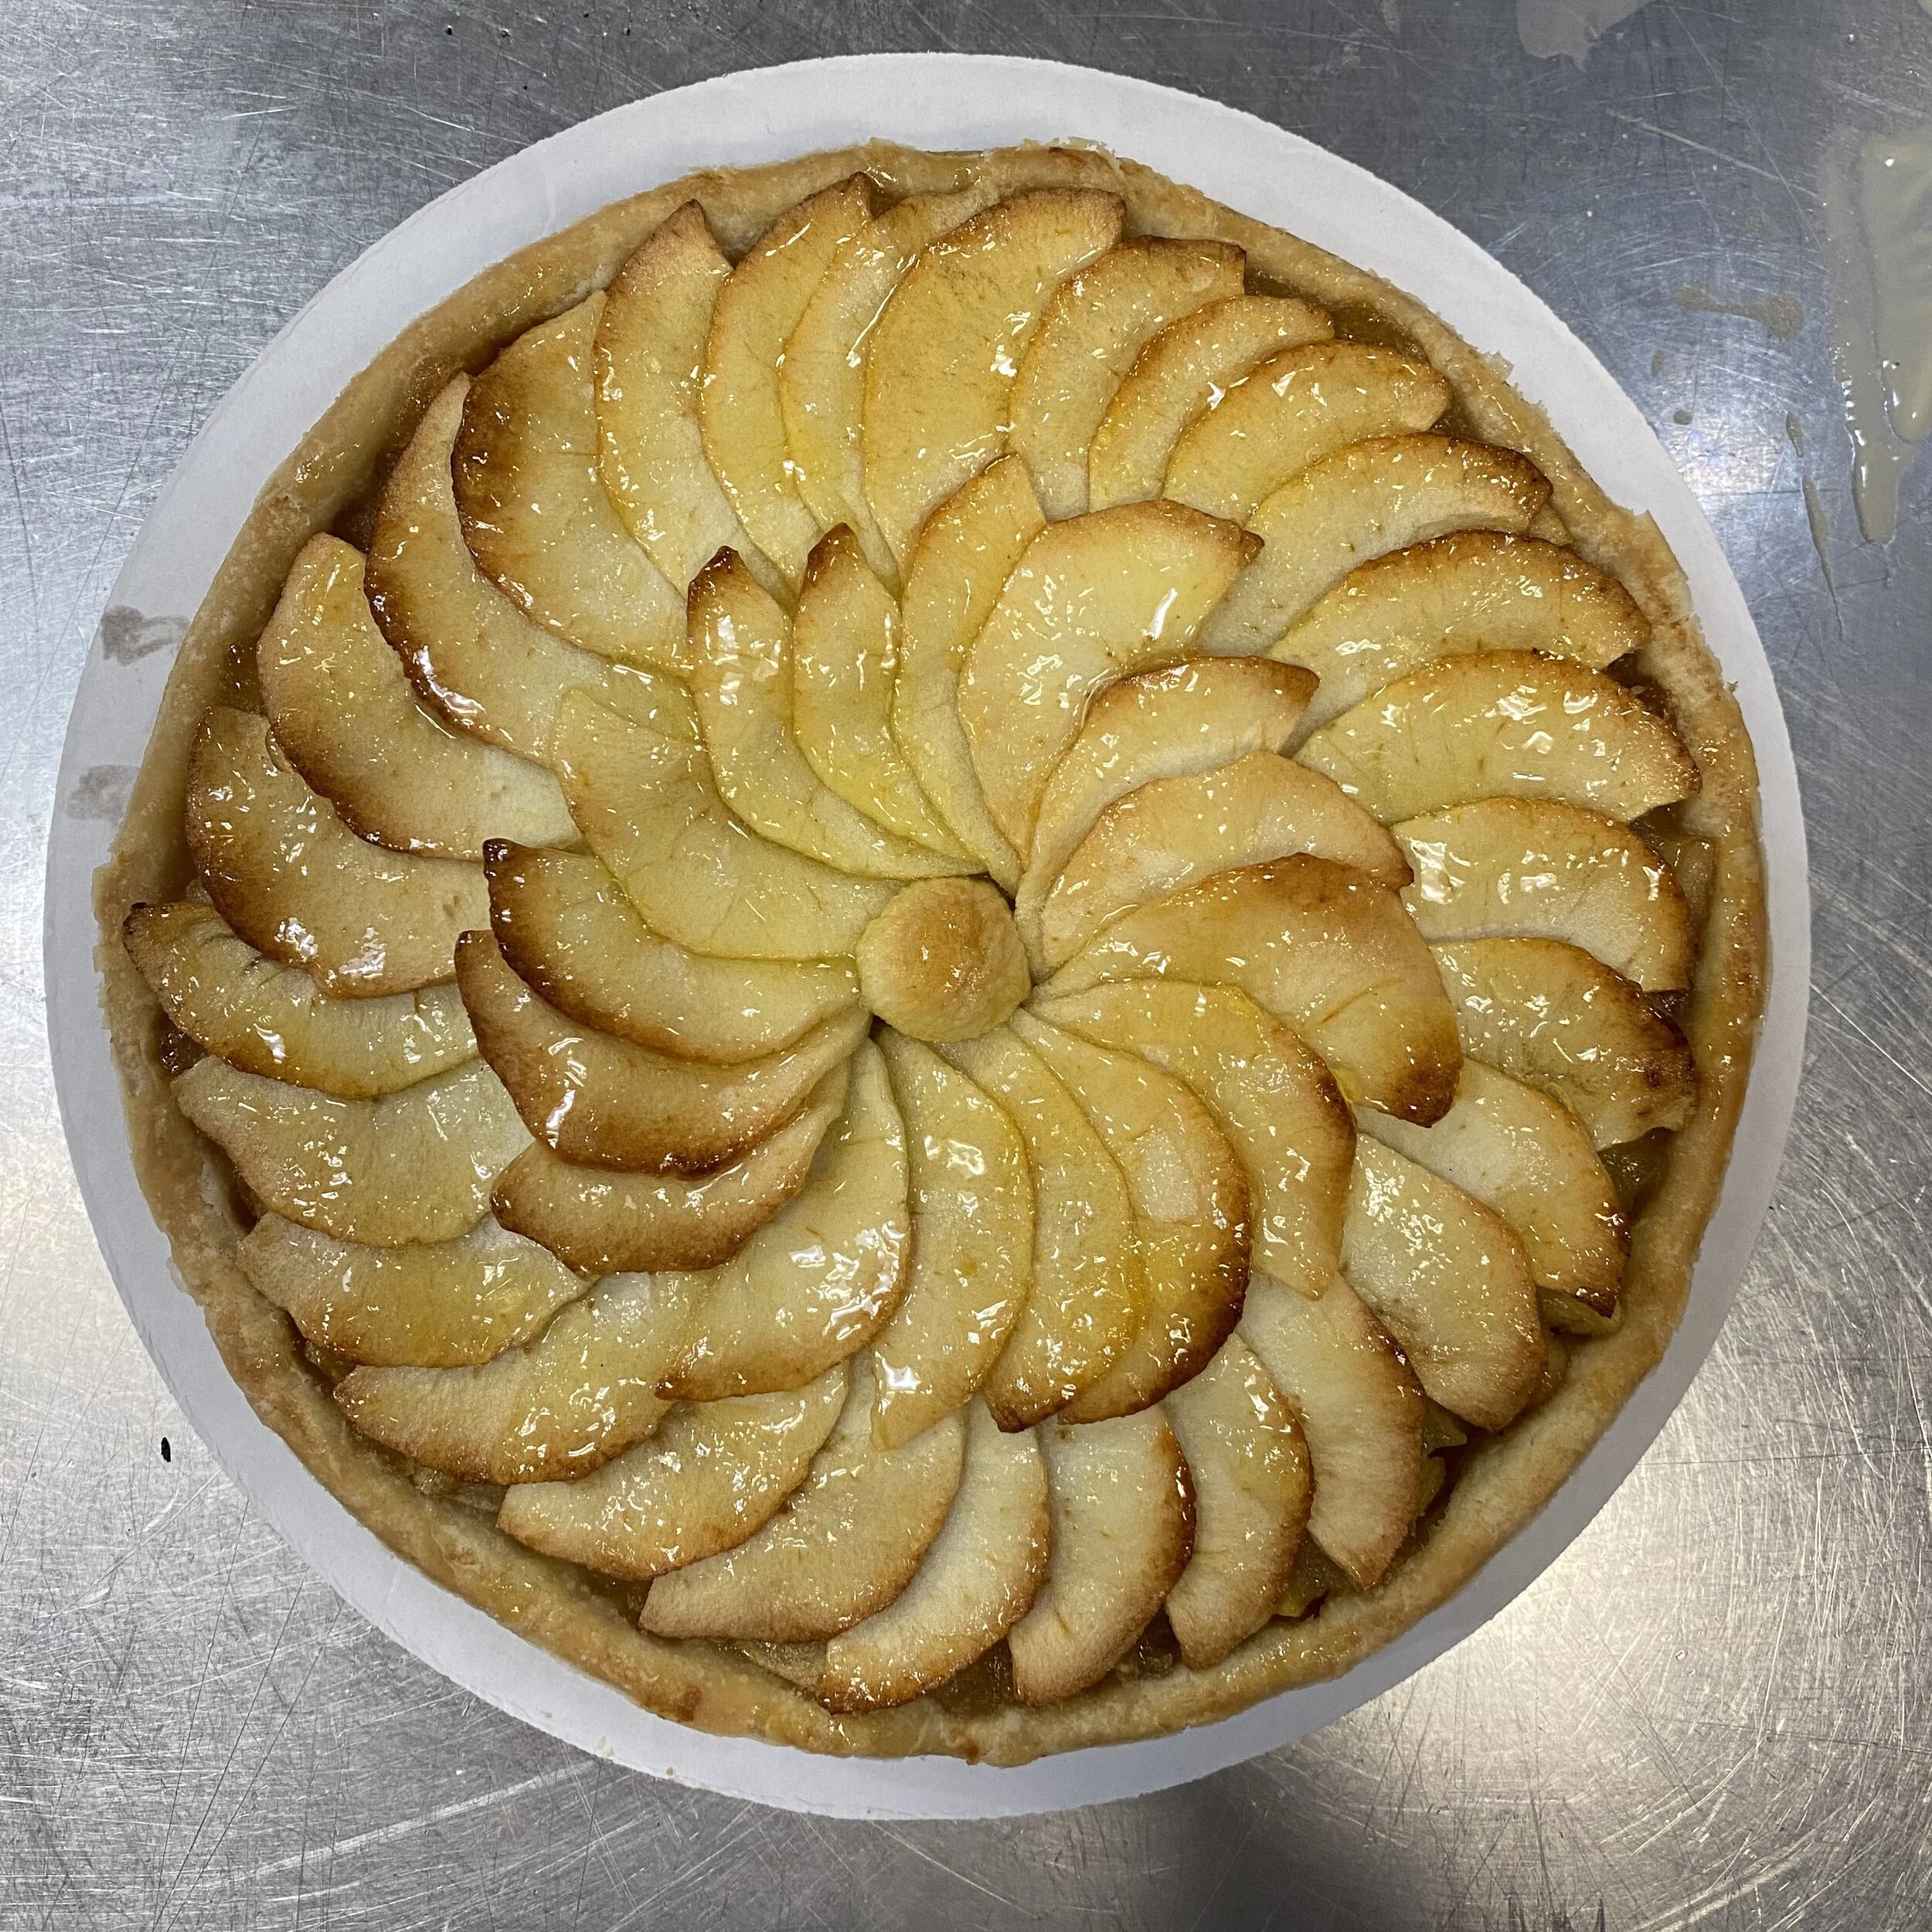
But my apple arranging is nothing to sneeze at!
I was back to a two page prep sheet for this combination, which was actually borrowed from a classmate who had completed this pairing in the three days before I started it, and then lightly edited by me. We all tried to help each other out, which made a huge difference. When it comes down to it, working in a professional kitchen is like playing on a sports team. When one person hits it out of the park, everybody wins.


In sum…
Level 4 was definitely a whirlwind, but I wouldn’t trade it for anything. It helped me solidify incredibly fundamental techniques that I now use all the time, and it showed me where I could continue to improve on my own (cough cough, pasta). In my next post, I’ll tell you about my final exams…which dishes appeared?? — I know you are dying to know. I’ll also share what it was like emotionally to finish school, and my overall takeaways from the entire experience. See you next time!